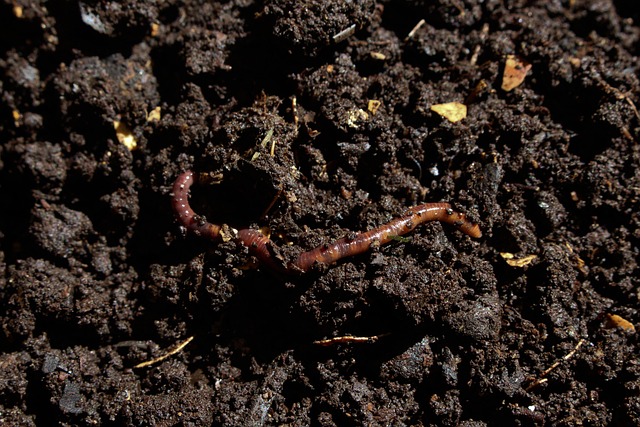
he vermi compost method is an organic process that uses earthworms to convert kitchen and garden waste into nutrient-rich compost. It improves soil structure, boosts plant growth and enhances microbial activity.
Rich in nitrogen, phosphorus and potassium, vermi compost acts as a natural fertilizer suitable for all types of plants. Common methods include pit, bed, tank, bag and continuous flow systems.
It’s eco-friendly, cost-effective and ideal for home gardeners and farmers looking to recycle waste and enrich their soil naturally.
WHAT IS VERMI COMPOST?
Vermi compost is an organic fertilizer produced with the help of earthworms. These worms feed on kitchen and garden waste, digest it, and release nutrient-rich castings that improve soil fertility.
The process doesn’t just create compost—it creates a living, microbe-packed soil conditioner that plants love.
Unlike synthetic fertilizers, vermi compost improves the soil over time, helping plants grow stronger and more resilient.
COMPOST VS VERMI COMPOST
Many people use the term “compost” for all organic waste that breaks down, but there’s a difference between compost and vermi compost.
COMPOST
Compost is made through microbial decomposition. Bacteria and fungi naturally break down organic waste into humus over several weeks or months.
It’s slower and often done in piles or pits where heat and microbes drive the process. The final compost is earthy, coarse and works well as a soil conditioner.
VERMI COMPOST
Vermi composting, on the other hand, uses earthworms such as Eisenia fetida or Eudrilus eugeniae.
These worms digest the waste and release castings that are rich in nitrogen, phosphorus, potassium and beneficial microbes. The process is faster and produces finer, darker compost with a mild earthy smell.
| Feature | Compost | Vermi Compost |
|---|---|---|
| Process | Microbial decomposition | Earthworm digestion and microbial activity |
| Time Required | 2–3 months | 30–45 days |
| Texture | Coarse and uneven | Fine and dark |
| Nutrient Level | Moderate | High in NPK and micronutrients |
| Microbial Count | Lower | Higher, rich in enzymes and beneficial bacteria |
| Odor | Can be strong or earthy | Mild earthy smell |
| Use | General soil conditioner | Growth booster and soil rejuvenator |
WHY VERMI COMPOST IS IMPORTANT?
The vermi compost method benefits both plants and the planet. It improves soil texture, increases water retention, and enhances microbial activity.
Plants grown in vermi compost-enriched soil show better root growth, more flowering, and improved disease resistance.
It’s also an eco-friendly solution that reduces kitchen waste and cuts down on the need for chemical fertilizers.

NUTRIENTS IN VERMI COMPOST
Vermi compost is packed with essential plant nutrients and beneficial microbes.
- Nitrogen (N): Promotes leafy growth
- Phosphorus (P): Strengthens roots and improves flowering
- Potassium (K): Boosts disease resistance and fruit quality
- Calcium and Magnesium: Improve soil structure and help nutrient absorption
- Micronutrients: Iron, zinc, copper, and manganese for healthy plant metabolism
- Humus and Enzymes: Encourage microbial activity and long-term soil fertility
This mix of nutrients and living organisms makes vermi compost one of the best organic fertilizers available.
VERMI COMPOST METHODS
Different setups work for different spaces and purposes. Whether you’re composting at home or on a farm, each vermi compost method has its own process, benefits, and challenges.
1. PIT METHOD
In this method, organic waste is placed in shallow pits lined with a base layer of dry leaves or soil.
Earthworms are added on top, and the pit is lightly covered with straw or gunny sacks.
Pros: Low-cost and simple to set up, ideal for rural areas or backyards.
Cons: Poor air circulation can cause foul odor and waterlogging during rains.
2. BED METHOD
Here, waste is arranged in raised beds that are 0.5–1 meter high, either on open ground or inside sheds. Layers of cow dung, dry matter, and organic waste are added and kept moist.
Pros: Excellent aeration and faster decomposition due to better airflow. Easy to harvest compost without disturbing worms.
Cons: Needs protection from direct sunlight and heavy rain, especially in open setups.
3. TANK METHOD
This involves composting inside cement, brick, or plastic tanks that protect worms from pests and external conditions. Small holes ensure air exchange and drainage.
Pros: Clean, durable, and suitable for both home and large-scale use. It keeps moisture and temperature consistent.
Cons: Slightly higher initial cost due to construction or material purchase.
4. BAG/BARREL METHOD
Ideal for homes and urban gardens, this method uses small containers, bags, or barrels with ventilation holes.
Kitchen waste and bedding materials are added in layers, making it compact and tidy.
Pros: Perfect for limited spaces, easy to move around, and very low maintenance.
Cons: Has limited capacity and needs regular monitoring to avoid overheating.
5. CONTINUOUS FLOW REACTOR METHOD
Used mainly for commercial vermi composting, this system allows new waste to be added from the top while finished compost is collected from the bottom.
It maintains a stable worm population and consistent output.
Pros: Produces high-quality compost continuously with minimal labor once set up.
Cons: Requires technical knowledge, proper equipment, and a higher initial investment.
PROCESS OF VERMI COMPOSTING
- Select a Container: Use a wooden box, cement tank, or plastic bin with holes for air.
- Add Bedding Material: Cow dung, dry leaves, shredded paper, or coir work well.
- Add Earthworms: Common types are Eisenia fetida and Eudrilus eugeniae.
- Layer Organic Waste: Add kitchen scraps and garden clippings in thin layers.
- Maintain Moisture: Keep it moist like a squeezed sponge.
- Cover Properly: Use a breathable cloth or jute sack.
- Turn Occasionally: Once a week for aeration.
- Harvest the Compost: In about 30–45 days, when it turns dark, crumbly, and earthy-smelling.
HOW TO USE VERMI COMPOST
Using vermi compost correctly gives the best results for different type of plants-
INDOOR PLANTS
Mix one part vermi compost with three parts potting soil. Apply a handful every 15–20 days for healthy growth.
FLOWERING PLANTS
Add vermi compost before and during the blooming season to improve flower size and color.
VEGETABLE PLANTS
Use before sowing and as a top dressing every 20 days. It boosts yield and improves flavor.
LAWNS & TREES
Spread around the root zone and water lightly. It enhances grass density and root strength.
BEST TIME TO USE
The ideal time is before the growing or flowering season. Reduce use during the dormant phase when plants need less nutrition.
DOs & DON’Ts OF VERMI COMPOSTING
Do:
- Keep the compost moist but not soggy
- Use vegetable peels, cow dung, dry leaves and paper bits
- Place the setup in a shaded area
Don’t:
- Add meat, oily food or citrus waste
- Expose worms to direct sunlight
- Let the pit flood during rain
COMMON PROBLEMS & SOLUTIONS
- Bad Smell: Usually from too much moisture or improper waste. Add dry leaves or paper.
- Worms Escaping: Temperature or pH imbalance. Keep it cool and neutral.
- Ants or Pests: Reduce dryness and cover properly.
USES IN GARDENING/FARMING
- Home gardens and potted plants
- Organic farming and nurseries
- Lawn care and landscaping
- Greenhouse cultivation and kitchen gardens
- Seedling trays and potting mixes
VERMI COMPOST vs OTHER MANURES
| Type | Nutrient Availability | Ease of Use | Effect on Soil |
|---|---|---|---|
| Cow Dung Manure | Moderate | Easy | Improves structure slowly |
| Regular Compost | Moderate | Easy | General soil conditioner |
| Vermi Compost | High | Easy to apply | Improves soil fertility rapidly |
| Biofertilizers | Specific nutrients | Needs care | Boosts certain plant functions |
Vermi composting reduces the amount of waste sent to landfills and cuts methane emissions. It provides an organic alternative to chemical fertilizers and helps farmers reduce input costs. For households, it’s a great way to recycle waste and produce free fertilizer year-round.
FAQs
1. How long does vermi composting take?
Vermi composting usually takes around 30 to 45 days, depending on temperature and moisture levels. The process is faster than regular composting because earthworms continuously break down the waste.
2. Can we use vermi compost daily for potted plants?
No, daily use isn’t needed. For potted plants, applying a handful once every 15 to 20 days is enough to maintain steady nutrient levels without overfeeding the plant.
3. What is the best season for vermi composting in India?
The ideal time is between 20°C and 30°C, which suits the worms best. Avoid extremely hot or cold months. Shade and moisture help maintain the right conditions year-round.
4. Can we mix vermi compost with chemical fertilizers?
Yes, you can, but it’s better to use less chemical fertilizer. Vermi compost already provides balanced nutrients and helps soil microbes recover from chemical exposure.
5. How do I know my vermi compost is ready?
It’s ready when it looks dark brown or black, feels crumbly, and smells earthy. You shouldn’t see any recognizable food particles or live worms at that stage.
Thanks for reading. Keep growing, keep exploring, and don’t forget to return here at gardeningbud.com for more plants, tips and gardening wisdom.